


Integrating a third-party payment gateway in your Shopify store allows you to access additional payment options beyond Shopify Payments. It enables you to accept back card payments, Google or Apple Pay, and other payment options, and possibly to reduce transaction fees in the process. In this guide, we will cover what you need to know to identify, configure, and optimize third-party payment gateways, including PayPal, Stripe, and more. You will learn which steps to take to get started, best practices for integration, the likelihood of issues happening, troubleshooting, and generally how to improve the customer checkout experience while ensuring you meet the necessary security and compliance requirements for your e-commerce business.
If you’re the owner of a Shopify store and would like to accept online payment, it’s essential to set up a third-party payment gateway. Although there is a payment gateway provided, indeed by Shopify itself. By integrating a third-party gateway, you may have additional options and be able to customize more things quite simply and the per-transaction fees are likely lower. Provided in this expansive guide we will lead you through the process of setting up a third-party payment gateway in your Shopify store setup: from selecting the right supplier to debugging problems that arise on the way.
Key Takeaways
- Third-party payment gateways, as opposed to Shopify Payments, provide a larger selection of payment types with decreased transaction costs.
- Third-party gateways examples include PayPal, Stripe, Square, Authorize.Net, and many other regional or domestic payment processors.
- To set up a third-party payment gateway, you must create an account with all your payment providers, configure your payment time in your Shopify admin, and conduct thorough testing on your transactions.
- Research into transaction costs, supported regions or countries, accepted payment methods, and integration complexity will aid in selecting the right payment gateway for your store.
- A sufficient number of testing transactions, considering their security compliance, were made so that implementation would run smoothly for customer checkout.
- You can set up multiple payment gateways at the same time for your customers’ convenience.
What is a Payment Gateway?
A payment gateway is an online technology service that processes credit card and digital payment transactions for online businesses. It is the secure communication option between your e-commerce store, your customers, and the financial institutions, and it acts to transmit payment information and money. The payment gateway is responsible for encrypting sensitive payment data, receiving transaction information from the customer’s cart, and then communicating with banks or credit card networks about whether or not to approve the payment in a split second.
Payment gateways do a few different things to complete a transaction; they capture payment information, encrypt and send securely, communicate with the payment processor and bank, and then communicate the results back to both the merchant and the customer about the result of their transaction. Payment gateways process many different types of payment; these include credit cards, debit cards, digital wallets, bank transfers, and even alternative payments like some Buy Now Pay Later options.
Why Do You Need A Payment Gateway?
Payment gateways are a critical component of any online business, as they allow secure and automated payment processing without requiring merchants to handle sensitive payment data. Payment gateways provide PCI DSS compliance and will lessen security risk/ liability to business owners when the secure card data is not retained or processed by their e-commerce website. Without a payment gateway, an online shop cannot process electronic payments or accept payments from customers, which drastically limits its ability to serve the customers and recover business revenue.
Also, payment gateways do a lot more than just process online payments. They help improve customer experience by providing reliable, fast, and seamless checkout experiences. Gateways provide a good deal of customer convenience with additional flexible payment options, and protection against fraud, chargebacks, and manage disputes/records through reporting and transaction records. For e-commerce websites offering international purchasing options, payment gateways facilitate multi-currency payments and allow for additional regionally established payment methods to better facilitate regional sales.
Payment gateways also provide valuable market and analytics data against customer UX and payment experience, authorizing data to better optimize the customer payment experience to decrease cart abandonment and improve first click to check out rates.
What is Shopify Payment Gateway?
Shopify Payments is the native payment processing solution integrated directly into the Shopify platform. It is intended for merchants who don’t want to have a third-party payment gateway account. It accepts credit cards, digital wallets (such as Apple Pay, Google Pay), and local payment methods, and is exclusively available in select countries. Two notable partners to the service are Stripe and PayOneer.
The best feature of Shopify Payments is that it is integrated into Shopify. You won’t be hit with the extra transaction fees that would normally be charged from using a third-party payment gateway app, your reporting will be presented inside of the Shopify admin dashboard, and you won’t need to consider PCI compliance since Shopify Payments automatically handles it for you! As a store owner, your financial reporting on payments, refunds, and disputes will all be managed straight from your Shopify admin, without needing to switch between services.
If you sell outside of approved Shopify Payments countries, you will not be supported. If you engage with a customer with any particular payment methods that Shopify Payments isn’t affiliated with, you’ll need to use third-party alternatives.
Why You Need Third-Party Payment Gateways?
It’s good to understand what a Third-Party Payment Gateway is and how it works before you set up. A Third-Party Payment Gateway is an outside entity that allows you to send your payment details (like your credit card number and expiration date) via the internet using its internet infrastructure. This secured information is passed from the customer to the merchant using a digital payment gateway.
Third-party payment gateways will be useful if Shopify Payments isn’t available in your country, or if they cannot offer your customers their preferred methods. While Shopify Payments accepts a variety of credit cards and some digital wallets, your payment gateway will offer additional region-specific methods, e-transfers, cryptocurrency, installments, and B2B payments. For these reasons, third-party payment gateways enhance conversion rates by providing the choices your customers want.
There’s also a cost. A third-party payment gateway may allow transactions at lower fees than Shopify Payments, especially for high-volume merchants. Certain transaction activities like fraud prevention, compliance, or industry-specific payment solutions only certain third-party services can provide (e.g., PayPal, Stripe), can also be a good reason to consider them for your global eCommerce business.
Step-by-Step Guide to Setting Up a Third-Party Payment Gateway in Shopify:
Research and Select Your Payment Gateway Provider
Choosing the right payment gateway provider is a weighty decision and one that can make or break the success of your Shopify store. Here is a step-by-step look at checking into and selecting the best business payment gateways available some guidelines to make sure that you get what suits your needs.
Identify Your Business Needs:
Prior to looking into payment gateway providers, you need to establish what your particular business needs. Consider things like:
- Accepted payment methods: Determine the payment options you wish to provide to your clients, such as credit/debit cards, digital wallets (e.g., PayPal, Apple Pay), or bank transfers.
- Geographic coverage: If you sell worldwide, make sure that the payment gateway accepts transactions in the countries where your consumers live.
- Geographic coverage: If you sell worldwide, make sure that the payment gateway accepts transactions in the countries where your consumers live.
- Security and compliance: Evaluate each provider’s security features and compliance standards (such as PCI DSS) for protecting sensitive client data.
Research Payment Gateway Providers:
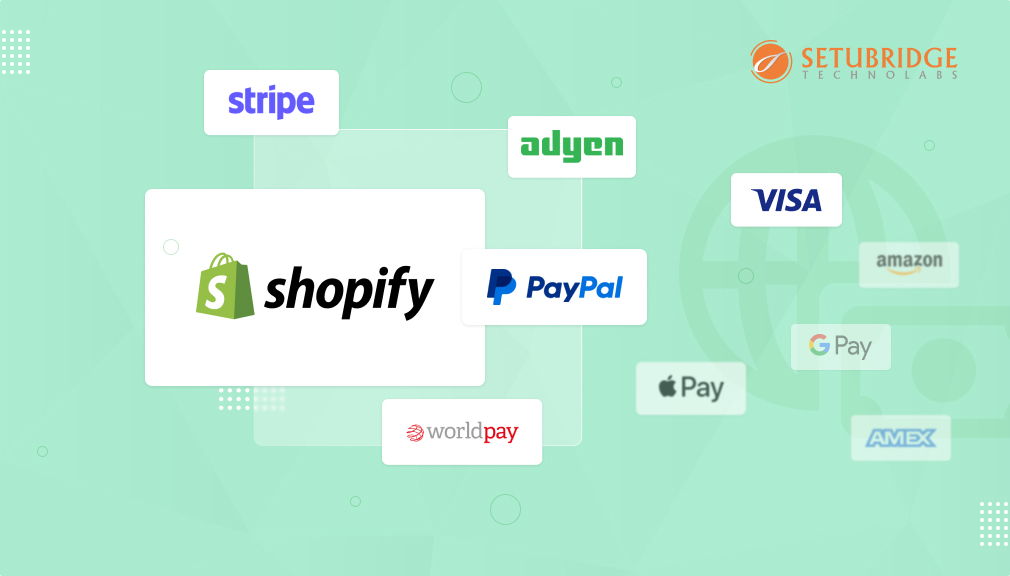
Once you have a clear understanding of your business needs, start researching different payment gateway providers. Some popular options for Shopify stores include:
- PayPal: Accepts a variety of payment methods, including PayPal, credit/debit cards, and PayPal Credit. Known for its user-friendliness and global appeal.
- Stripe offers customizable payment solutions with advanced features like recurring billing, subscription management, and support for over 135 currencies.
- Authorize.Net: Offers secure payment processing with features like fraud detection, customer data management, and compatibility with multiple shopping carts.
- Square: Known for its user-friendly interface and transparent pricing, Square offers payment processing solutions tailored for online, in-person, and mobile transactions.
Additionally, explore niche-specific payment gateways that cater to specific industries or regions, as they may offer specialized features or lower transaction fees.
Sign Up for an Account with the Chosen Payment Gateway Provider
Follow the provider’s instructions to create an account and complete any necessary verification steps, such as providing business information and linking a bank account.
Configure Your Payment Gateway Settings in Shopify
Configuring your payment gateway settings in Shopify is a straightforward process that allows you to seamlessly integrate third-party payment providers with your store. Here’s a detailed guide on how to do it:
- Log in to Your Shopify Admin Dashboard: The first step is logging into your Shopify account. After you’ve entered the account details homeowners will land on the Shopify backend’s dashboard, and then click the arrow button at the bottom right-hand side of the page to take you to manage form submission public pages.
- Navigate to the “Settings” Tab: In the left-hand column of the dashboard, you will find a collapsible menu tree. Down near the bottom of the sidebar menu, click on “Settings.” This will expand a menu with several options.
- Select “Payment Providers”: Under the “Accept payments” section of the payment providers page, click on the button that says “Add a provider.” This will trigger Shopify to display a list of available payment providers for you to integrate with your store.
- Add a Provider: Then, from the menu that appears, select your preferred payment gateway. This could be PayPal, Stripe, Authorize.Net, Square Payments, or any other type of processor and company that you’ve selected to do business with when it comes time for your nature shop to go live on the Netwrap platform.
- Choose Your Chosen Third-Party Gateway: From the list of available payment providers, locate and select your chosen third-party gateway. This could be PayPal, Stripe, Authorize.Net, Square, or any other provider that you’ve decided to use for processing payments on your Shopify store.
- Enter Your Account Credentials or API Keys: After selecting your preferred payment gateway, Shopify will urge you to provide your account credentials or API keys to connect your store to the payment provider. These credentials may contain your merchant ID, API username, API password, or secret keys, depending on your provider’s specific requirements.
- Save Your Changes: Once you’ve entered the required username, passwords, and API keys, Shopify will prompt you to review your settings. Next, click ‘Save’ or ‘Connect’ to save all changes and to link your webshop up with one of the third-party payment gateways.
Test Your Payment Gateway Integration Before going live, it’s essential to test your payment gateway integration to ensure that transactions are processed smoothly. Shopify provides a sandbox or test mode that allows you to simulate transactions without charging real money. Perform test transactions using different payment methods and scenarios to verify that everything works as expected.
Go Live and Start Accepting Payments Once you’re confident that your payment gateway integration is working correctly, you can switch to Shopify store to live mode and start accepting payments from customers. Monitor your transactions closely during the initial rollout to address any issues promptly.
Common Challenges and Troubleshooting Tips:
While setting up a third-party payment gateway in Shopify is relatively straightforward, you may encounter some challenges along the way. Common issues include configuration errors, payment processing failures, and compatibility issues with other apps or themes. Refer to Shopify’s documentation and support resources for troubleshooting guidance, and don’t hesitate to reach out to your shopify payment gateway provider for assistance if needed.
Best Practices for Optimizing Your Payment Gateway Setup:
To maximize the effectiveness of your payment gateway setup, consider implementing best practices such as:
Enable Fraud Detection and Prevention Measures:
Protecting your Shopify store from fraudulent transactions is paramount. Use the fraud detection as well as avoidance functions provided by your payment gateway of choice. This may incorporate address verification, card verification value (CVV) checks, or uptime scoring to determine the legitimacy of orders in a matter of seconds. Flagging suspicious transactions and putting preventive measures into practice means that you can minimize exposure to chargebacks and potential financial loss.
Optimize Your Checkout Flow:
To decrease frustration and reduce the risk of leaving your store without paying for anything, you can make the checkout process as simple as possible. Cut the steps it takes to purchase five down to three ensure that there are few or no stumbling blocks and distractions along your way. If you adopt a single page checkout or simplify to a three-step process, customers will find it much easier. And more profitable for your business.
Regularly Review and Update Settings:
Persist in managing the payment gateway settings proactively. This way, you can ensure they keep working at peak capacity and comply with all necessary Performance Standards. Fraud rules, payment methods, and settings for both multi-currency map collections must be periodically reviewed or updated to suit your business demands or the changing regulations of an industry in times like now. By keeping abreast of up-to-date and best practices, you can keep your payment processing environment secure. It could even become more efficient than where it stands now.
Monitor Transaction Data and Analytics:
By viewing transaction data and analysis, find valuable perspectives on the performance of your payment gateway. It means measuring logical indicators such as transaction volume, success rates, and average order value to identify trends, patterns, and areas for improvement. You can use this data to shift your checkout flow design, catch potential problems early on, and make use of chances to raise the customer experience as a whole.
Conclusion:
By viewing transaction data and analysis, find valuable perspectives on the performance of your payment gateway. It means measuring logical indicators such as transaction volume, success rates, and average order value to identify trends, patterns, and areas for improvement. You can use this data to shift your checkout flow design, catch potential problems early on, and make use of chances to raise the customer experience as a whole.
Ready to streamline your payment process and boost sales? Set up a third-party payment gateway on your Shopify store today and provide your customers with secure, flexible payment options. Get started now!
FAQs
Can I use multiple payment gateways on my Shopify store?
Yes, Shopify allows you to activate more than one payment gateway at once. Customers can select which payment method they’d like to use in the checkout. Do note that you’ll likely pay transaction fees, as well as the applicable processing fees for each payment gateway used.
Are there additional fees for using third-party payment gateways?
Yes, for all third-party payment gateways, Shopify typically charges you extra transaction fees (0.5% to 2%), plus the payment processing fee from the gateway being used. If discounts on transaction fees are important to you, we suggest you use Shopify Payments instead.
How long does it take to set up a third-party payment gateway?
Initial implementation times differ by provider, but expect typical approval and integration times of 1-3 business days, depending on the service provider. Some providers may require as few as a few clicks to register and activate, such as with PayPal Express, while providers requiring bank verification will take longer.
Which third-party payment gateway is best for my store?
The best payment gateway ultimately relies on your situation; location, targeted markets, and transaction volume all matter. There are widely available options, such as PayPal, Stripe, Square, and Authorize.Net, to name a few. Take into consideration fees, countries supported, significant levels of integration effort, etc.
Do I need technical knowledge to set up a third-party payment gateway?
Most third-party payment gateways are configured through Shopify’s admin and are therefore easy to set up without any coding experience. There may be technical changes or advanced features that need developer knowledge to configure.
How do I test my payment gateway before going live?
Most payment gateways have testing or sandbox modes where you can process fake transactions and verify the settings. It is a good practice to always test the entire checkout process and consider both success and failure scenarios before accepting real payments!

Shopify Expert
Dipen Panchal, Shopify Tech Lead at Setubridge Technolabs, brings over a decade of expertise as a Shopify Expert. Passionate about e-commerce growth, he specializes in UI/UX design, crafting intuitive, engaging solutions tailored for merchants and B2B clients to enhance user experiences.