


What does the situation look like when someone from New York visits your store and reads the identical date as a customer from a remote farm in Montana? It’s a conversion problem. Recent Baymard Institute research shows that 70.22% of online shopping carts are abandoned, and shipping-related friction remains a major factor, with 21% of shoppers abandoning purchases due to slow delivery and 39% due to unexpected shipping costs and fees.
Don’t give the customer a vague “5–8 business days”; the delivery window starts to mean nothing. A shopper ordering from a large metro who gets next-day delivery shouldn’t see a different ETA than someone who lives in an area your courier doesn’t deliver to for four more days. Generic delivery messages don’t work for either of them.
The problem: there is no built-in way in Shopify to display different return delivery times depending on the customer ZIP, postal or pincode on the product page. The same message is shown to everyone.
In this guide, I will cover exactly how to set different delivery dates for different Postcodes in Shopify (using both the manual code solution and the app-based solution), and you will understand why (for most store owners), the only solution is through the app.
Key Takeaways
- Shopify has no built-in feature to show ZIP code-specific delivery dates on product pages.
- The code-based approach is technically possible but fragile, difficult to maintain, and limited in functionality.
- An app-based setup requires no coding and gives you full control over rules, widget design, and cart behavior.
- Auto-detect shows the correct ETA automatically using IP-based location, with zero friction for the customer.
- You can target rules to specific products, collections, vendors, or product tags for precise control.
- Cutoff time and countdown timer add urgency and increase same-day order conversions.
- Blocking Add to Cart for invalid Postcodes prevents fulfillment errors and reduces cancellations.
- Location-based delivery estimates directly reduce cart abandonment, support tickets, and post-purchase complaints.
Why Location-Based Delivery Dates Directly Impact Your Revenue
Delivery information is not just a shipping piece of information anymore. Now it is a part of the buying decision. Convey research indicates that 87% of online consumers take delivery speed into account while buying online. PwC’s Global Consumer Insights Survey found that 41% of online shoppers are willing to pay an additional fee for same-day delivery, highlighting that customers value speed when the delivery option is clearly available at checkout.
When a product page displays a precise, accurate delivery date based on the actual customer’s location, one of the last major uncertainties is gone. Customers can now stop wondering and start clicking.
Here is what zipcode-wise delivery estimates do for your store:
- Reduce cart abandonment by answering the delivery question before checkout
- Build trust with first-time visitors who do not know your brand or logistics yet
- Lower support ticket volume: customers who see a clear ETA upfront don’t email asking “where is my order?”
- Protect your fulfillment operations: you can block orders from areas outside your delivery zones entirely
- Increase conversions for location-specific ad campaigns by matching the delivery promise to the audience
As global eCommerce revenue is predicted to hit more than $6.8 trillion by 2028, the stores that can close that conversion gap with better on-page info are the ones that thrive. Location-based delivery dates represent one of the most direct levers available to you.
What Shopify Does by Default and Where It Falls Short
Out of the box, Shopify has no feature to show estimated delivery dates on product pages, including ZIP code-based Shopify delivery date estimates, let alone ones that vary by ZIP code or postal code. You can configure shipping zones and rates in the admin, but none of that data surfaces to the customer while they are browsing.
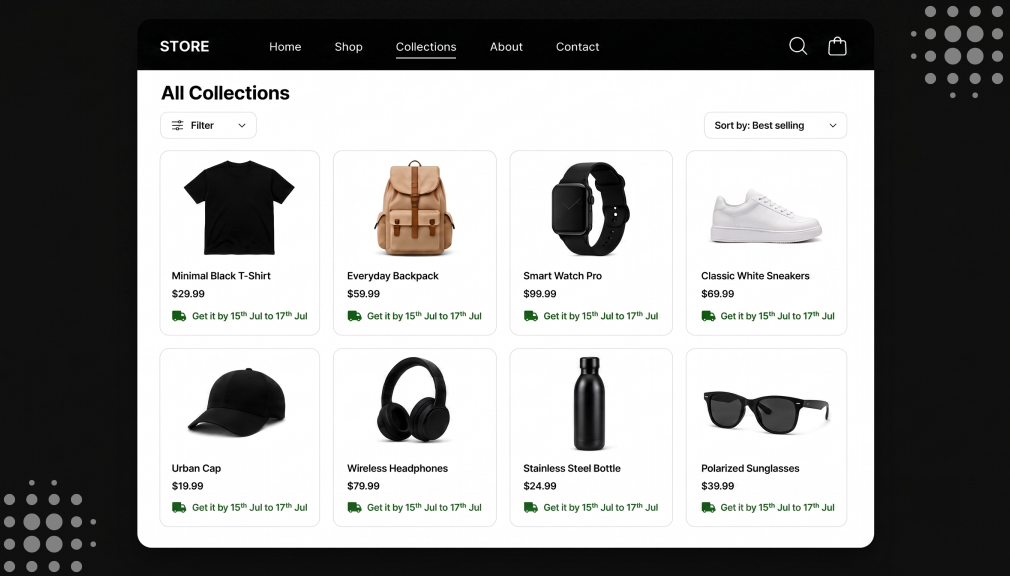
Some themes include a static “Ships in 3–5 days” message, but it shows the same text to everyone. A customer in Los Angeles and a customer in a remote region see identical information, even when your actual delivery timelines are completely different.
| The Core Gap: Shopify’s product page has no dynamic delivery date widget. It cannot detect where a customer is, match their Postcode to your shipping rules, and display an accurate ETA without a third-party solution. |
This may seem like a small point, but it actually isn’t. 38% of customers say they wouldn’t buy again from a retailer after a bad experience. Setting the wrong expectation (or none) at the product page is one link in the long chain that adds to that number.
Ways to Show Different Shopify Delivery Dates by ZIP Code
With those options, it’s really down to two options: custom code or a specific app. By understanding the differences, you actually end up saving yourself time, money, and developer work.
Option 1: The Code-Based Approach
It is technically possible to implement a Postcode delivery checker using custom Liquid JavaScript within your Shopify theme. The idea in principle: place an input widget on the product page, check the user-provided ZIP against a hardcoded lookup table, and show a result.
It sounds feasible on paper. In practice, it has some grave limitations that a fair proportion of merchants forget about:
- There is no admin UI. Every time a delivery rule changes, a developer must go into the theme code and update a static ZIP code table manually. This is slow, error-prone, and expensive if you use freelance help.
- There is no auto-detection. Customers have to type their ZIP when they want to order. No auto-filling with their IP address or their logged-in account stored data.
- Breaks very easily. When you update themes, install a new app, or change your Shopify plan, the custom code might be overwritten or conflict, and the widget disappears altogether.
- Nothing too advanced can be achieved. Anything more than simple ‘if… then…’ conditions like based-on-inventory rules, cutoff times, countdown timers, or jamming the Add to Cart button for zones that can’t be serviced will require a lot more development.
- It isn’t scalable. Code-based systems turn into a full-time job as you grow out your delivery zones or change delivery partners.
| Bottom Line: Unless you have an in-house development team and a very simple, static delivery zone setup, the code-based approach creates more problems than it solves. |
Option 2: App-Based Setup (Recommended)
An entirely custom Shopify app to do without any need to write a single line of code. Estimated Delivery Date app has been created exclusively for Shopify merchants requiring quick, flexible, and the most accurate location-specific delivery estimates on their product pages.
The app allows you to:
- Set separate delivery date rules for specific Postcodes, postal code ranges, or pincode prefixes
- Auto-detect the customer’s location via IP; the correct ETA shows before they type anything
- Pull the ZIP code from a logged-in customer’s saved Customize the widget title, colors, messages, and button labels to match your brand
- Block the “Add to Cart” button entirely if the customer’s Postcode is outside your delivery zone.
- Add a ZIP code checker on the cart page.
- Apply rules to specific products, collections, vendors, or product tags, not just store-wide
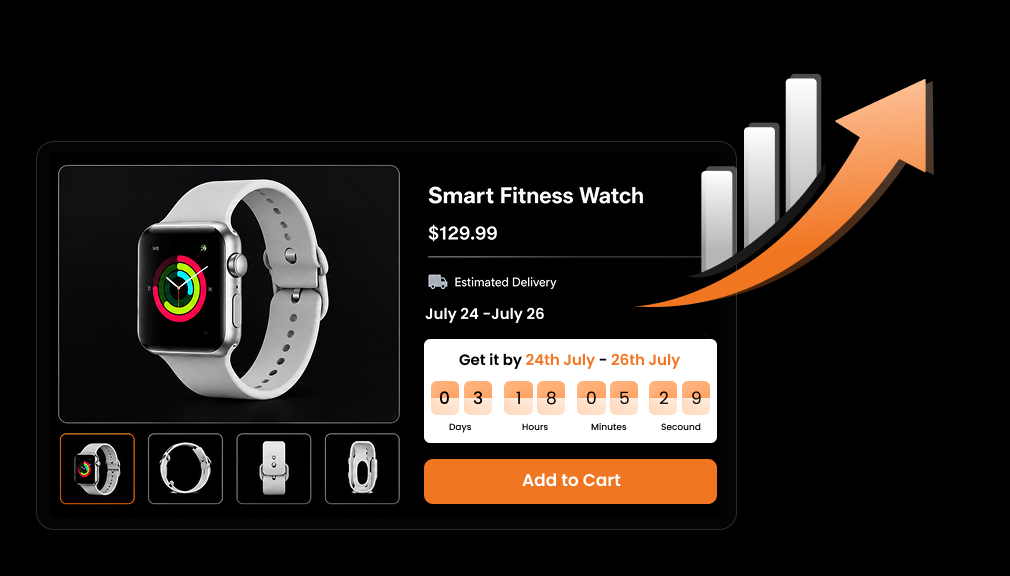
- Set a cutoff time and display a live countdown timer to drive same-day order urgency
- The next section walks through the exact setup, step by step
The next section walks through the exact setup, step by step.
Step-by-Step: Configure Shopify ETA by ZIP Code Using EDD App
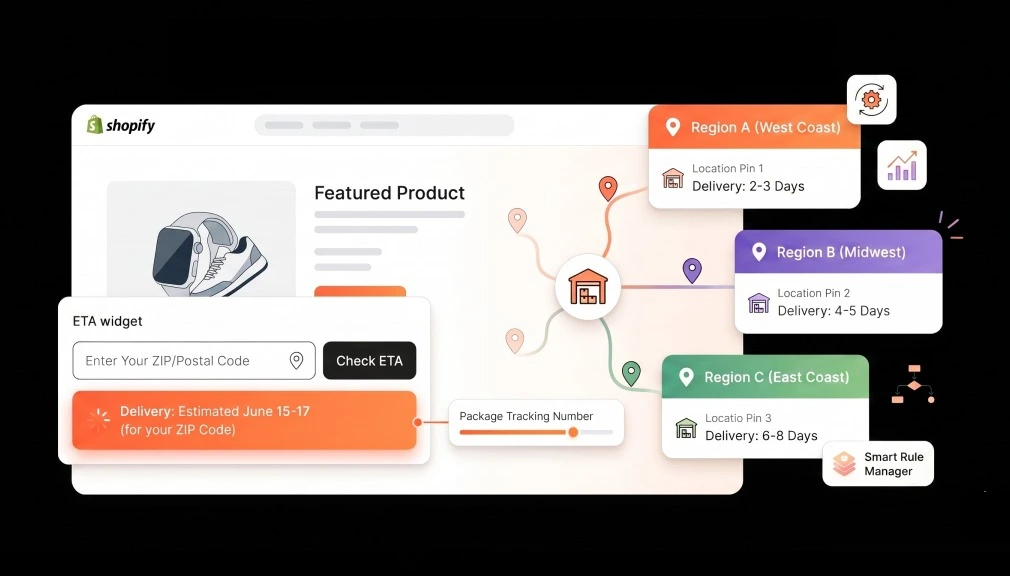
This setup uses the Auto-Detect Enabled configuration. Once live, the widget automatically shows the estimated delivery date based on the customer’s detected location; no manual input is required on their end.
| Step 1 | Create a New ETA Rule: Go to ETA Rules in the app settings and create a new rule. This rule will define the delivery timeline, conditions, and display behavior for your target Postcodes. |
| Step 2 | Enable the ZIP Code Checker Widget: Inside your rule settings, find the “Show Zipcode Checker Widget” toggle and turn it on. This activates the delivery date widget and Postcode input field on your product page. |
| Step 3 | Add Your ZIP Codes: Enter the Postcodes, pincodes, or postal codes you want to target. You have three flexible input options: individual codes (e.g., 90210), code ranges (e.g., 10001–10099), or code prefixes (e.g., 902 to target all codes starting with 902). Click Add after each entry to save. |
| Step 4 | Configure Auto-Detection Options: This step gives you three powerful delivery control settings; see details below. |
| ⚙ Auto-detect ZIP code: Fetches the customer’s location via IP address. If it matches a configured delivery rule, the correct ETA appears automatically, with zero input required from the customer. |
| ⚙ Fetch Postcode from logged-in customer data: Uses the customer’s saved default shipping address. Falls back to IP-based detection automatically if no address is stored. |
| ⚙ Require valid ZIP code for Add to Cart: Locks the Add to Cart button until the customer enters a Postcode that matches a valid delivery rule. Prevents orders from unserviceable locations before they are placed. |
After selecting your preferred options, click Apply to save.
| Step 5 | Customize the ZIP Code Widget: Open the Zipcode Checker Settings popup. From here, you can: edit the widget title, input placeholder, and button label; write custom messages for unserviceable Postcodes and empty inputs; adjust button and text colors, including hover states; and preview the widget with sample ZIP codes. Click Apply when done. |
| Step 6 | Set Product Conditions: Choose which products this rule applies to. Options include All Products, Specific Products, Collections, Vendors, or Product Tags. You can also set whether the rule applies to in-stock products only, out-of-stock products only, or both, giving you precise control over when the ETA appears. |
| Step 7 | Configure Cutoff Time, Date Format, and Countdown Timer: Set your order cutoff time (orders placed before this time ship the same day), choose your preferred date display format, and configure a countdown timer to show customers how long they have until the cutoff. This timer creates genuine urgency and consistently lifts same-day order volume. |
| Step 8 | Select ETA Template and Add Lead Days: Choose a delivery message template, write your message using lead day shortcodes, then click Save. Example: “Estimated Delivery: [Lead Day Min] – [Lead Day Max] business days.” The shortcodes pull calculated delivery dates dynamically based on the customer’s Postcode and your rule configuration. |
Final Verification
After saving all settings, visit your product page and confirm that the ZIP code checker widget is visible, the auto-detected Postcode is showing correctly, and the displayed ETA matches your expected delivery window for that location. Your Shopify delivery date ZIP code setup is now live, allowing customers to view accurate delivery estimates based on their location.
What This Setup Does for Your Store
Apart from the configuration steps, here’s what this feature really does for most of the merchants in the real world:
- Less missed orders. When the merchandise can be delivered on a certain date and to a specific place, consumers are less likely to walk away. In fact, 96% of shoppers said they would do business again with a retailer that provided good delivery.
- Fewer support requests after buying. Having delivery expectations on the product page results in fewer “where is my order?” emails after buying.
- Improved ROI from regional ad campaigns. For instance, if you advertise for cities or PIN codes, displaying accurate delivery ETAs to those geographies would greatly boost your conversion rates.
- Fewer orders canceled from unserviceable zones. The “Require valid Postcode for Add to Cart” feature cancels orders we would not be able to deliver before they even get placed, saving you and your customer time and hassles.
- Scalable rule management. With a single tap, you update one setting in the app dashboard, as your delivery zones, partners, or lead time evolve.
Conclusion
Meeting the correct delivery date with the correct customer, given their correct location, is one of the easiest enhancements you can add to your Shopify product pages. This becomes even more effective when adding ZIP codes to Shopify store settings to ensure accurate location-based delivery estimates. It turns guesswork into certainty, minimizes ambiguity at the point in which your shopper is most vulnerable, and provides a more tangible incentive to buy and not leave.
The code-way can work in theory, but for most Shopify Storefronts, many auto-detection, customizable widget, inventory-aware rules, cutting timers, and Shopify delivery date zip code validation with cart protection for unserviceable zones only result in an impossible fine balance of maintenance burden, technical instability, and unusably narrow feature set. An app-based solution offers all of the above in eight steps and no code.
If your store continues to display the identical delivery message to each customer no matter their geographic region, this is an easy thing to fix. Delivery dates by ZIP code are no longer a premium feature; they are what people expect. The stores that have them implemented successfully will always perform better.
Frequently Asked Questions
Q: What is the easiest way to set up a Shopify delivery date by Postcode?
A: Using a Shopify app is the easiest method. It requires no coding and lets you configure rules, enable auto-detection, and customize the widget in minutes.
Q: How does the auto-detect ZIP code feature work in app?
A: The app reads the customer’s IP address to determine their approximate location. If the detected ZIP code matches one of your rules, the correct ETA appears automatically no manual entry is required from the customer.
Q: Can I show different ETAs for different products in the same Postcode?
A: Yes. You can create separate ETA rules for specific products, collections, or product tags, each with different lead days, all displayed dynamically based on the same customer Postcode.
Q: What happens if a customer’s ZIP code is not in my delivery zone?
A: You set a custom unserviceable message for those cases. If you also enable “Require valid ZIP code for Add to Cart,” the button remains locked until a valid serviceable Postcode is entered.
Q: Does this setup work for international stores with postal codes or pincodes?
A: Yes. The app supports US ZIP codes, Indian pincodes, UK postal codes, and all other formats. You can enter individual codes, ranges, or prefixes to cover entire regions efficiently.
Q: Will the delivery date widget slow down my product page?
A: No. The widget loads asynchronously and is designed to Shopify’s performance standards. It will not negatively impact your page speed or Core Web Vitals scores.
Q: Can I customize how the delivery date widget looks on my store?
A: Yes. You can edit the title, input placeholder, button label, button and text colors, and messages for unserviceable or empty inputs, all without touching any code.

Shopify Expert
Dipen Panchal, Shopify Tech Lead at Setubridge Technolabs, brings over a decade of expertise as a Shopify Expert. Passionate about e-commerce growth, he specializes in UI/UX design, crafting intuitive, engaging solutions tailored for merchants and B2B clients to enhance user experiences.