





Two shoppers open the same product page at the same moment. One lives across town from your warehouse, the other far away. Both see the same line: “Ships in 3–5 business days.” The nearby shopper could get it tomorrow but feels no urgency. The faraway shopper expects it fast, then feels misled later.
This mismatch quietly costs Shopify stores sales every single day. One flat date cannot fit every location you ship to. Shoppers want a date that matches their own doorstep. The fix is to display different delivery dates for different ZIP codes. This guide shows you how to do that the smart way.
Key Takeaways
- A delivery postcode or ZIP code marks where an order is delivered.
- Displaying different delivery dates by ZIP builds real, local trust.
- Shopify’s native tools set rates by postcode, not delivery dates.
- Group ZIP codes into zones to keep the setup simple.
- An app is the best, no-code way to show these dates.
- Custom code works but is fragile and hard to maintain.
- Auto-detect the ZIP, but let shoppers correct it.
What Is a Delivery Postcode (or ZIP Code)?
Let us start simple, since these terms confuse many people. A delivery postcode is the postal code where an order is delivered. In the US, people call it a delivery ZIP code instead. Both mean the same thing: a short code marking a delivery area. It tells carriers and stores exactly where a parcel is going.
So what is a delivery postcode actually used for? It helps calculate shipping cost, transit time, and serviceability. A ZIP or postal code narrows a country to a small region. That precision lets you show an accurate date per area. This is the base for all ZIP code delivery rules on Shopify.
What Does It Mean to Display Delivery Dates by ZIP Code?
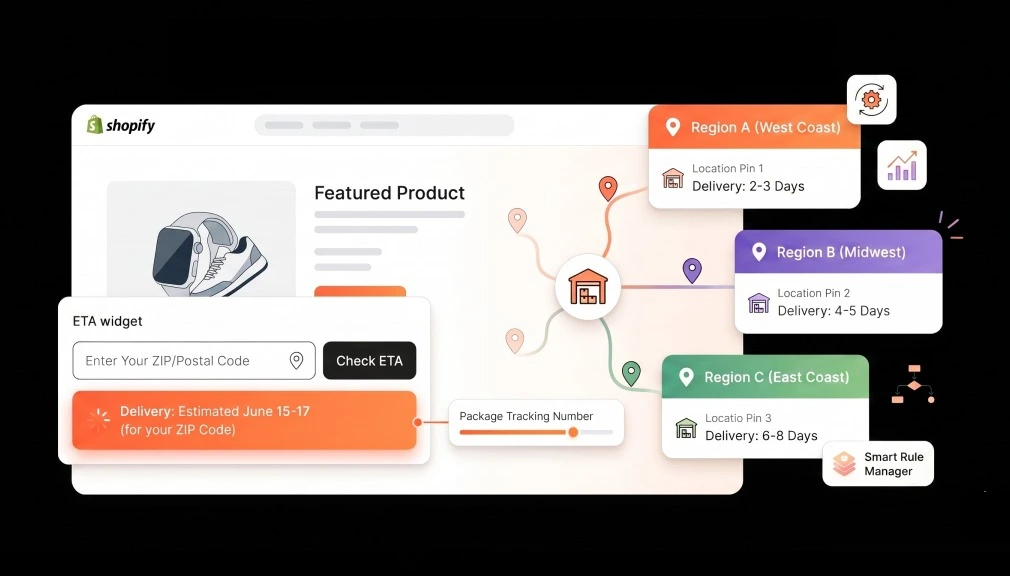
To display delivery dates by ZIP code is simple at heart. Each postcode sees a delivery estimate based on its real location. A shopper enters their ZIP, or the store detects it. The page then shows the honest arrival window for that area. This is Shopify delivery date by location, made clear and personal.
This is different from two things people often confuse. It is not a shipping rate that changes by postcode. It is also not a calendar picker for choosing a slot. It simply shows an accurate delivery date per ZIP code. That focus on the date is what builds real buyer trust.
Why Show Different Delivery Dates by ZIP Code?
A location-based date builds trust at the moment of doubt. According to Baymard Institute research, cart abandonment sits near 70%. Slow or unclear delivery is a top reason shoppers leave. A vague, one-size date feeds that doubt for many. A ZIP-based date answers “when will it reach me?” clearly.
Shoppers reward stores that show honest, specific dates. Narvar’s 2025 shopper survey found 73% let a date guide their purchase. Even more striking, 40% will not buy without a clear date. Delivery date research adds that 53% abandon over slow delivery. A precise postcode date meets that need on the page.
The benefits go beyond the single sale too. Accurate ZIP-based dates reduce “Where is my order?” tickets sharply. They also let you honour local holidays per region. And they boost regional ads that promise fast local delivery. Real-world Shopify tests tie clear dates to 12–25% higher conversion.
Regional ads gain a special boost from ZIP-based dates too. Say you promote fast delivery to one nearby city. Shoppers click, then see a date that matches your ad. That kept promise turns more paid clicks into orders. Your ad budget simply works harder with local dates.
What Shopify Can’t Do Natively
You might expect Shopify to handle this on its own. Sadly, its native tools stop short of what you need. Shopify shipping zones set rates by postcode, not delivery dates. Its local delivery feature checks availability, not a product-page ETA. So native settings never show a delivery date by ZIP up front.
There are other quiet limits worth knowing about too. Native tools skip cut-off times, holidays, and auto-detection. They cannot show a distinct date for every postcode. Merchants confirm this gap often in the Shopify community. For real postcode delivery dates, you need a dedicated tool.
How ZIP-Based Delivery Dates Work: Delivery Zones
The smart way to do this uses delivery zones, not single ZIPs. Managing thousands of ZIP codes one by one is impossible. Instead, you group postcodes that share a similar timeline. Each zone then gets one clear, honest delivery window. This keeps adding ZIP codes to your Shopify store simple.
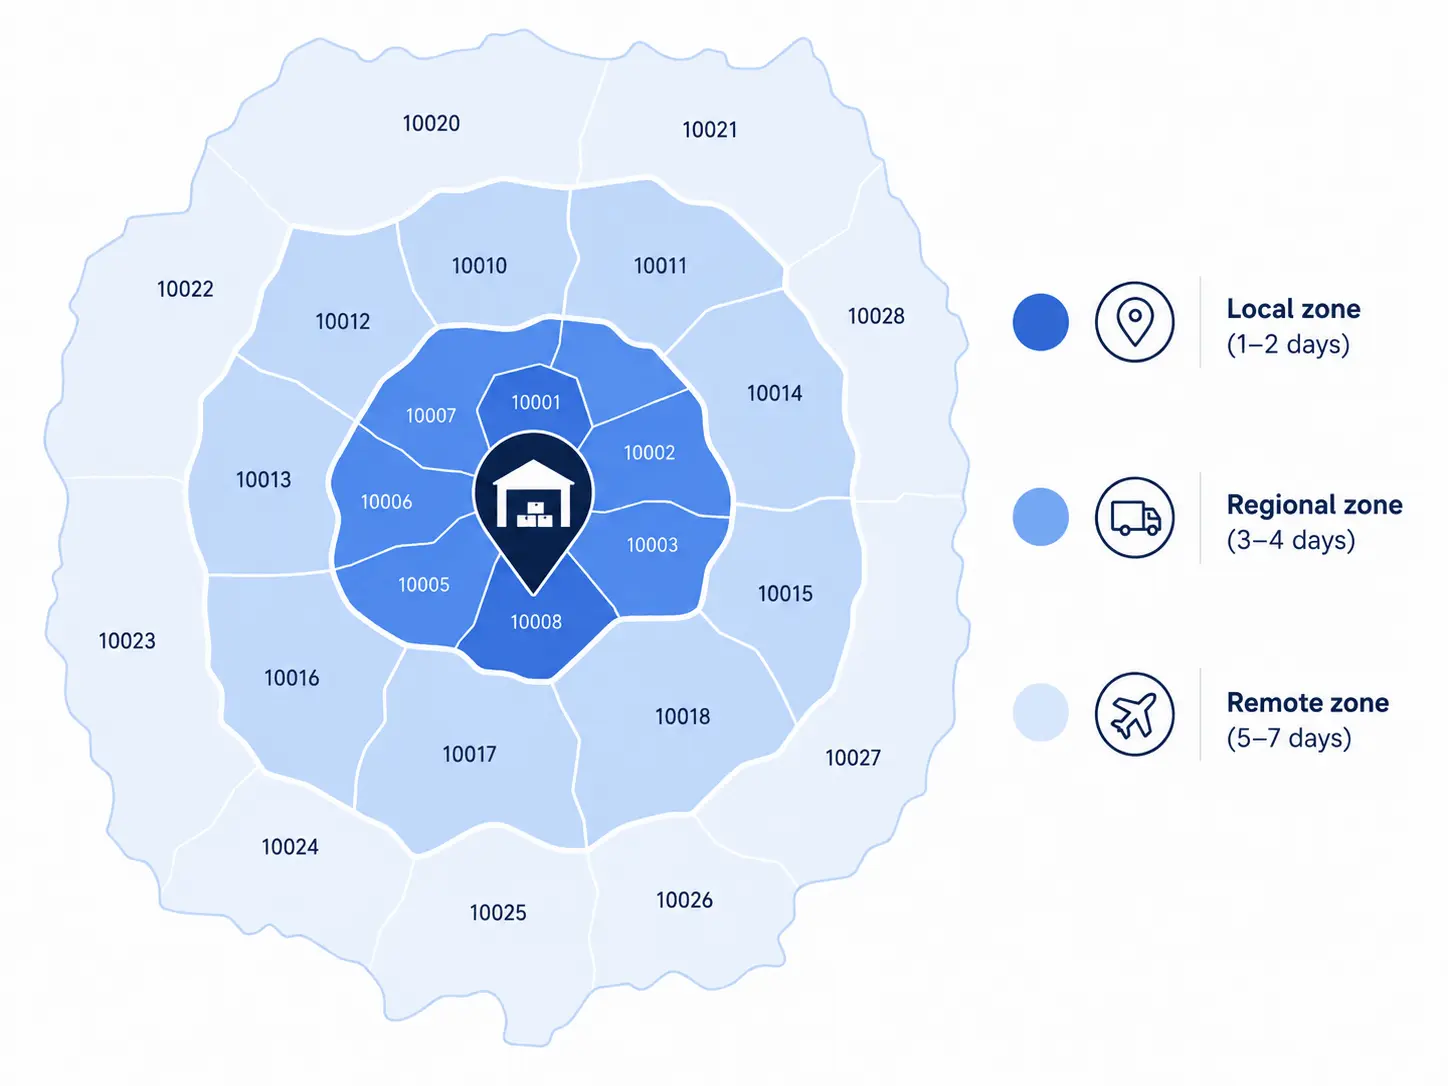
Think of three simple zones as a quick example:
- Local zone: nearby ZIPs, arriving in one to two days.
- Regional zone: mid-distance ZIPs, arriving in three to four days.
- Remote zone: far ZIPs, arriving in five to seven days.
You add more zones as your shipping data grows. Local holidays or events can shift a zone’s window. This zone method scales cleanly as your store keeps expanding. It gives shoppers accuracy without endless manual work. That is why zones sit at the core of most setups.
A Real Example: Two ZIP Codes, Two Promises
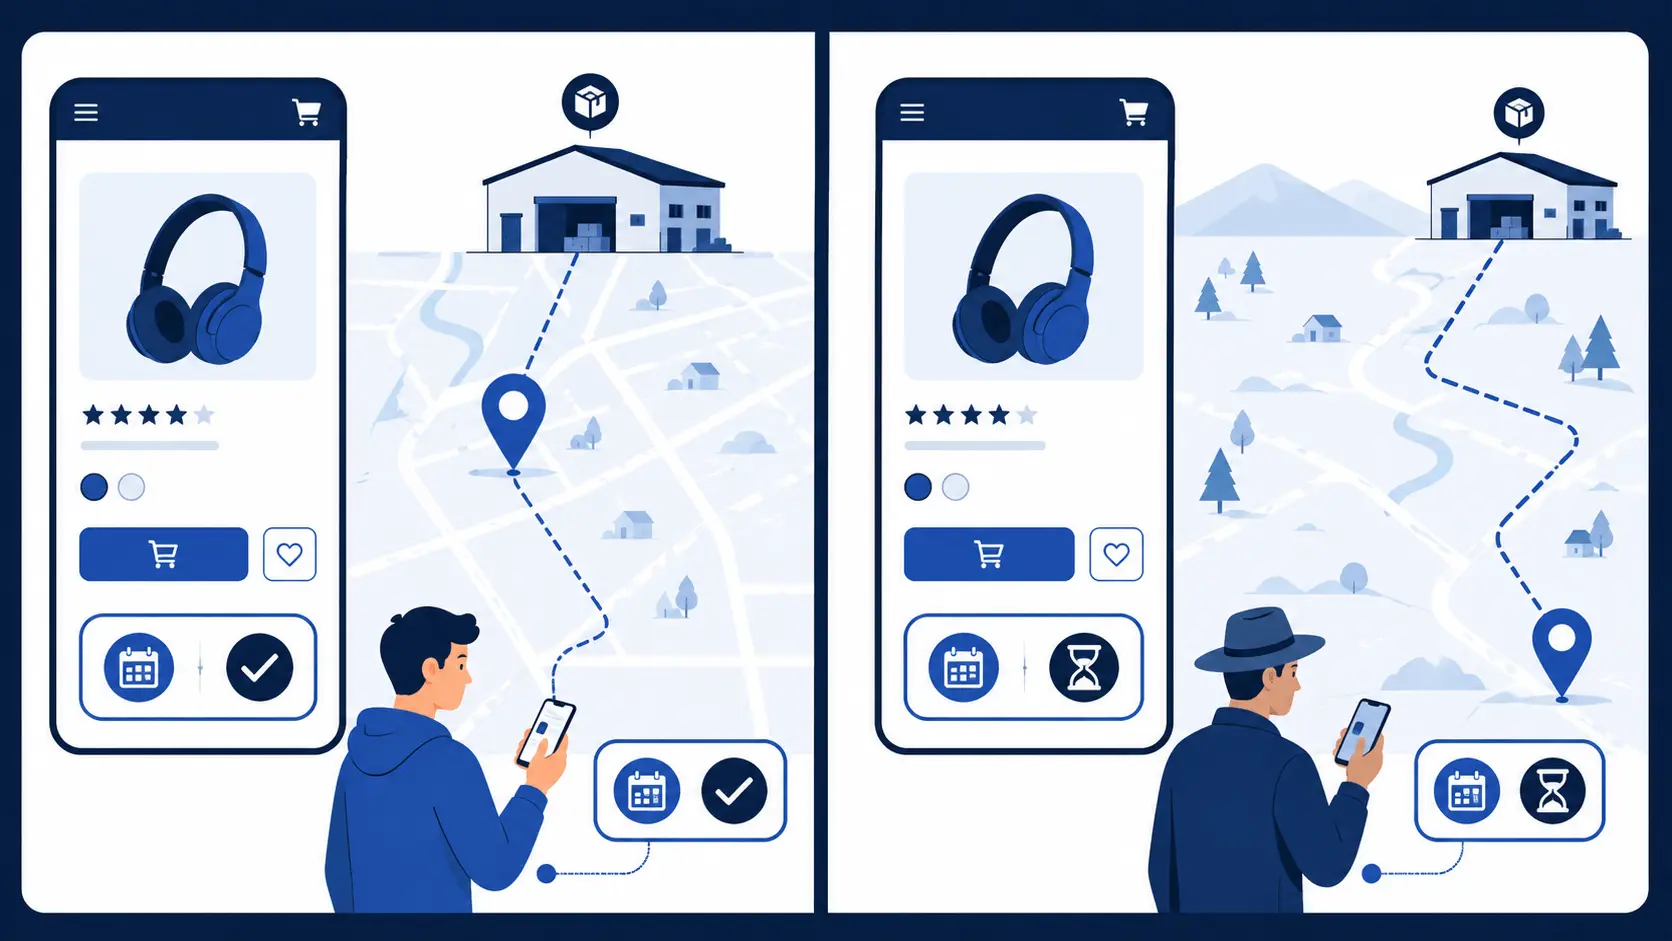
Picture a customer in your home city viewing a lamp today. Your warehouse sits just a few miles from her address. A generic “3–5 days” hides that she could get it tomorrow. With ZIP dates, she sees “Arrives tomorrow” and buys fast. That speed becomes a reason to choose you over rivals.
Now picture a shopper in a distant, rural ZIP code. She sees an honest “Arrives in 6 days” instead of a false one. She knows what to expect, so she buys with confidence. Later, her order arrives on time, just as promised. Both shoppers trust you, though their dates were different.
Which Stores Benefit Most From ZIP-Based Dates?
ZIP-based dates help almost any store that ships widely. They matter most when delivery times swing by location. These store types often see the biggest gains from them:
- Local delivery brands promising same-day or next-day service.
- Furniture or freight sellers with slow, zone-based transit.
- Perishable or floral shops where timing truly matters.
- Stores running region-specific ads for fast delivery.
- Merchants shipping from several warehouses across the map.
If your delivery speed changes by region, this fits well. It replaces one shaky average with many honest promises. Each shopper then sees a date built for their area. That accuracy builds trust where a generic date fails. The wider your map, the more ZIP dates help you.
Ways to Show Different Shopify Delivery Dates by ZIP Code
With those options, it’s really down to two options: custom code or a specific app. By understanding the differences, you actually end up saving yourself time, money, and developer work.
Option 1: The Code-Based Approach
It is technically possible to implement a Postcode delivery checker using custom Liquid JavaScript within your Shopify theme. The idea in principle: place an input widget on the product page, check the user-provided ZIP against a hardcoded lookup table, and show a result.
It sounds feasible on paper. In practice, it has some grave limitations that a fair proportion of merchants forget about:
- There is no admin UI. Every time a delivery rule changes, a developer must go into the theme code and update a static ZIP code table manually. This is slow, error-prone, and expensive if you use freelance help.
- There is no auto-detection. Customers have to type their ZIP when they want to order. No auto-filling with their IP address or their logged-in account stored data.
- Breaks very easily. When you update themes, install a new app, or change your Shopify plan, the custom code might be overwritten or conflict, and the widget disappears altogether.
- Nothing too advanced can be achieved. Anything more than simple ‘if… then…’ conditions, like based-on-inventory rules, cutoff times, countdown timers, or jamming the Add to Cart button for zones that can’t be serviced, will require a lot more development.
- It isn’t scalable. Code-based systems turn into a full-time job as you grow out your delivery zones or change delivery partners.
| Bottom Line: Unless you have an in-house development team and a very simple, static delivery zone setup, the code-based approach creates more problems than it solves. |
Option 2: App-Based Setup (Recommended)
The easiest way to Show Different Shopify Delivery Dates by ZIP Code is with the Estimated Delivery Date app. It lets Shopify merchants display location-specific delivery estimates without writing a single line of code. Built exclusively for Shopify, the app provides quick, flexible, and highly accurate ZIP code–based delivery dates that help set clear customer expectations and improve the shopping experience.
The app allows you to:
- Set separate delivery date rules for specific Postcodes, postal code ranges, or pincode prefixes
- Auto-detect the customer’s location via IP; the correct ETA shows before they type anything
- Pull the ZIP code from a logged-in customer’s saved Customize the widget title, colors, messages, and button labels to match your brand
- Block the “Add to Cart” button entirely if the customer’s Postcode is outside your delivery zone.
- Add a ZIP code checker on the cart page.
- Apply rules to specific products, collections, vendors, or product tags, not just store-wide
- Set a cutoff time and display a live countdown timer to drive same-day order urgency
- The next section walks through the exact setup, step by step
The next section walks through the exact setup, step by step.
Step-by-Step: Configure Shopify ETA by ZIP Code Using EDD App
This setup uses the Auto-Detect Enabled configuration. Once live, the widget automatically shows the estimated delivery date based on the customer’s detected location; no manual input is required on their end.
| Step 1 | Create a New ETA Rule: Go to ETA Rules in the app settings and create a new rule. This rule will define the delivery timeline, conditions, and display behavior for your target Postcodes. |
| Step 2 | Enable the ZIP Code Checker Widget: Inside your rule settings, find the “Show Zipcode Checker Widget” toggle and turn it on. This activates the delivery date widget and Postcode input field on your product page. |
| Step 3 | Add Your ZIP Codes: Enter the Postcodes, pincodes, or postal codes you want to target. You have three flexible input options: individual codes (e.g., 90210), code ranges (e.g., 10001–10099), or code prefixes (e.g., 902 to target all codes starting with 902). Click Add after each entry to save. |
| Step 4 | Configure Auto-Detection Options: This step gives you three powerful delivery control settings; see details below. |
| ⚙ Auto-detect ZIP code: Fetches the customer’s location via IP address. If it matches a configured delivery rule, the correct ETA appears automatically, with zero input required from the customer. |
| ⚙ Fetch Postcode from logged-in customer data: Uses the customer’s saved default shipping address. Falls back to IP-based detection automatically if no address is stored. |
| ⚙ Require valid ZIP code for Add to Cart: Locks the Add to Cart button until the customer enters a Postcode that matches a valid delivery rule. Prevents orders from unserviceable locations before they are placed. |
After selecting your preferred options, click Apply to save.
| Step 5 | Customize the ZIP Code Widget: Open the Zipcode Checker Settings popup. From here, you can: edit the widget title, input placeholder, and button label; write custom messages for unserviceable Postcodes and empty inputs; adjust button and text colors, including hover states; and preview the widget with sample ZIP codes. Click Apply when done. |
| Step 6 | Set Product Conditions: Choose which products this rule applies to. Options include All Products, Specific Products, Collections, Vendors, or Product Tags. You can also set whether the rule applies to in-stock products only, out-of-stock products only, or both, giving you precise control over when the ETA appears. |
| Step 7 | Configure Cutoff Time, Date Format, and Countdown Timer: Set your order cutoff time (orders placed before this time ship the same day), choose your preferred date display format, and configure a countdown timer to show customers how long they have until the cutoff. This timer creates genuine urgency and consistently lifts same-day order volume. |
| Step 8 | Select ETA Template and Add Lead Days: Choose a delivery message template, write your message using lead day shortcodes, then click Save. Example: “Estimated Delivery: [Lead Day Min] – [Lead Day Max] business days.” The shortcodes pull calculated delivery dates dynamically based on the customer’s Postcode and your rule configuration. |
Final Verification
After saving all settings, visit your product page and confirm that the ZIP code checker widget is visible, the auto-detected Postcode is showing correctly, and the displayed ETA matches your expected delivery window for that location. Your Shopify delivery date ZIP code setup is now live, allowing customers to view accurate delivery estimates based on their location.
Auto-Detect vs Manual ZIP Entry
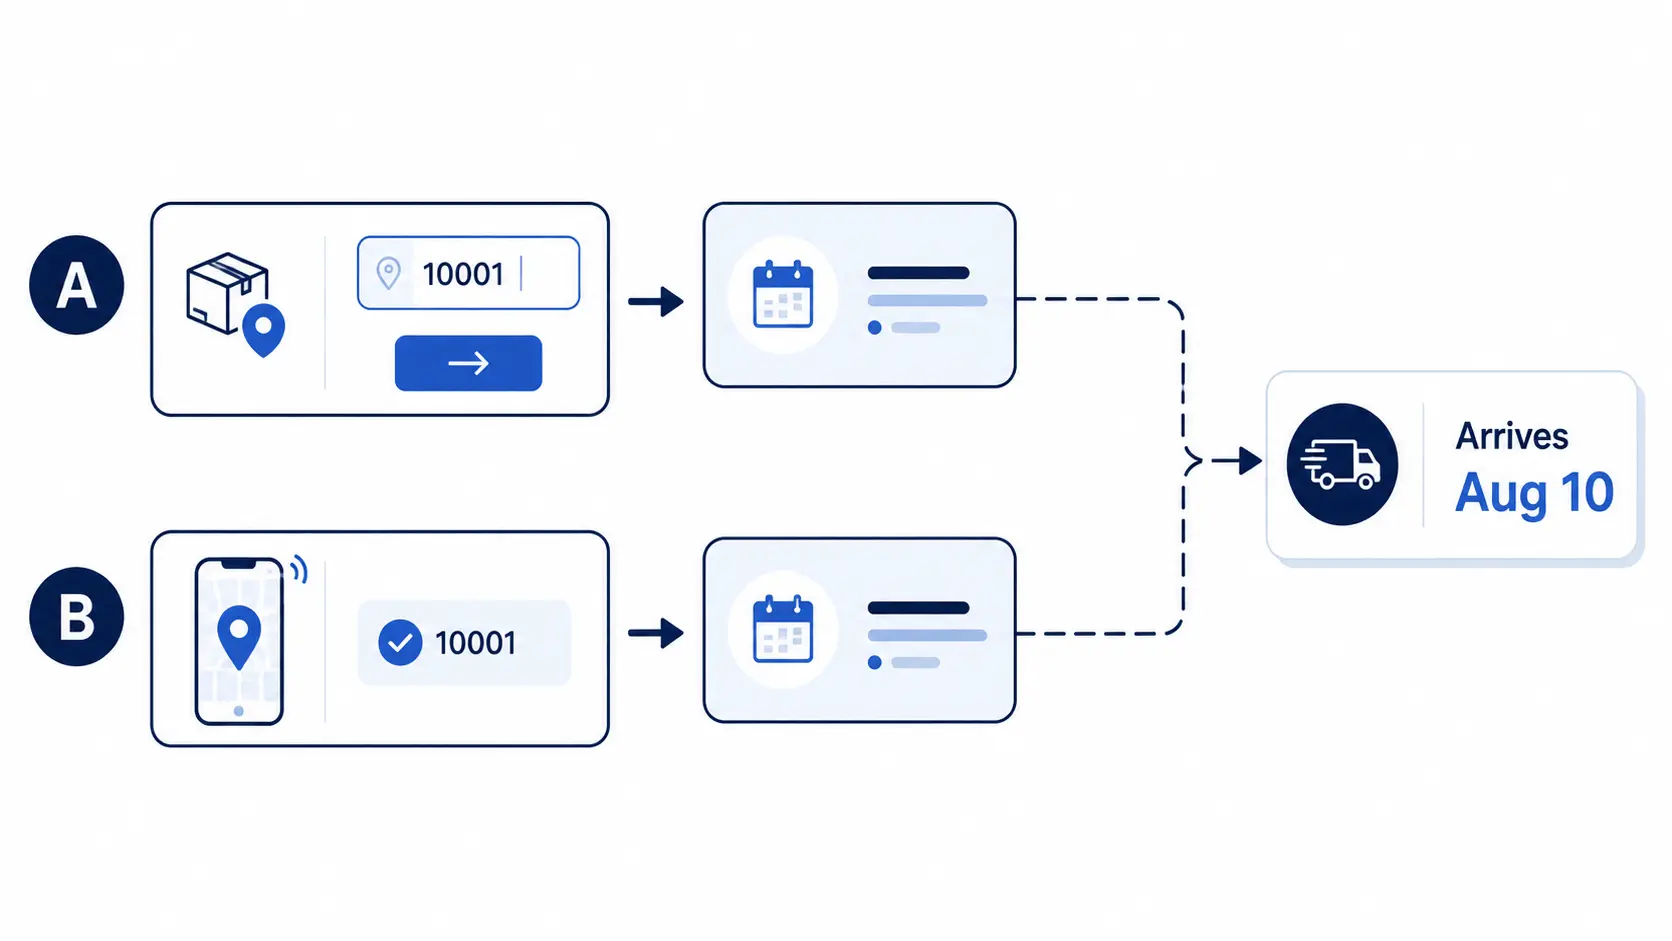
You can gather the shopper’s ZIP in two main ways. The first is a simple input where they type it in. The second uses geolocation to detect it automatically. Auto-detection feels effortless and removes a small step. Typing is fine too, and gives shoppers full control.
The best setups often combine both approaches smoothly. They auto-fill the ZIP, then let the shopper correct it. That way the date appears fast but stays accurate. A wrong guess never traps the buyer in a bad estimate. This balance keeps the experience quick and trustworthy.
ZIP-Based Message Examples
The right wording turns a ZIP date into real reassurance. Keep each message short, local, and easy to scan. Here are simple examples you can adapt per zone:
- Local: “In your area (10001)? Arrives tomorrow, Aug 8.”
- Regional: “Shipping to 30301 — arrives by Aug 11.”
- Remote: “Delivery to 99501 — arrives Aug 13–15.”
- Auto-detected: “Good news! Delivery to your ZIP by Aug 10.”
Notice how each message names the ZIP and a real date. That local detail proves the promise is built for them. A friendly line, like “Good news,” adds warmth simply. Shoppers feel seen, and seen shoppers buy with more confidence. Small, specific details turn hesitation into completed orders.
Best Practices for ZIP-Based Delivery Dates
Great ZIP-based dates are honest, clear, and location-aware. Group postcodes into simple zones, not endless single rules. Always show a window you can truly meet per area. Place the date below your price and stock line. Most shoppers check that spot first, so it grabs attention.
Account for local holidays and events that shift timing. Show dates in the shopper’s local time zone for accuracy. Keep your zones updated as transit times change. Test both nearby and distant ZIPs before going live. A living, accurate system stays trustworthy across every postcode.
Final Thoughts
Those two shoppers deserved dates that matched their own homes. To display different delivery dates by ZIP gives each shopper honest clarity. It turns a vague, average guess into a precise local promise. That clarity builds trust, lowers abandonment, and lifts your sales. In today’s market, this precision is expected, not a bonus.
You do not need a big team to make this happen. An app can show delivery dates by postcode in just minutes. Custom code stays an option for large, technical teams. Either way, the goal is the same: honest, local delivery clarity. Set them up, and watch more carts become orders.
Frequently Asked Questions
Q: What is the easiest way to set up a Shopify delivery date by Postcode?
A: Using a Shopify app is the easiest method. It requires no coding and lets you configure rules, enable auto-detection, and customize the widget in minutes.
Q: How does the auto-detect ZIP code feature work in app?
A: The app reads the customer’s IP address to determine their approximate location. If the detected ZIP code matches one of your rules, the correct ETA appears automatically no manual entry is required from the customer.
Q: Can I show different ETAs for different products in the same Postcode?
A: Yes. You can create separate ETA rules for specific products, collections, or product tags, each with different lead days, all displayed dynamically based on the same customer Postcode.
Q: What happens if a customer’s ZIP code is not in my delivery zone?
A: You set a custom unserviceable message for those cases. If you also enable “Require valid ZIP code for Add to Cart,” the button remains locked until a valid serviceable Postcode is entered.
Q: Does this setup work for international stores with postal codes or pincodes?
A: Yes. The app supports US ZIP codes, Indian pincodes, UK postal codes, and all other formats. You can enter individual codes, ranges, or prefixes to cover entire regions efficiently.
Q: Will the delivery date widget slow down my product page?
A: No. The widget loads asynchronously and is designed to Shopify’s performance standards. It will not negatively impact your page speed or Core Web Vitals scores.
Q: Can I customize how the delivery date widget looks on my store?
A: Yes. You can edit the title, input placeholder, button label, button and text colors, and messages for unserviceable or empty inputs, all without touching any code.

Shopify Expert
Dipen Panchal, Shopify Tech Lead at Setubridge Technolabs, brings over a decade of expertise as a Shopify Expert. Passionate about e-commerce growth, he specializes in UI/UX design, crafting intuitive, engaging solutions tailored for merchants and B2B clients to enhance user experiences.